")
Why Make This Recipe
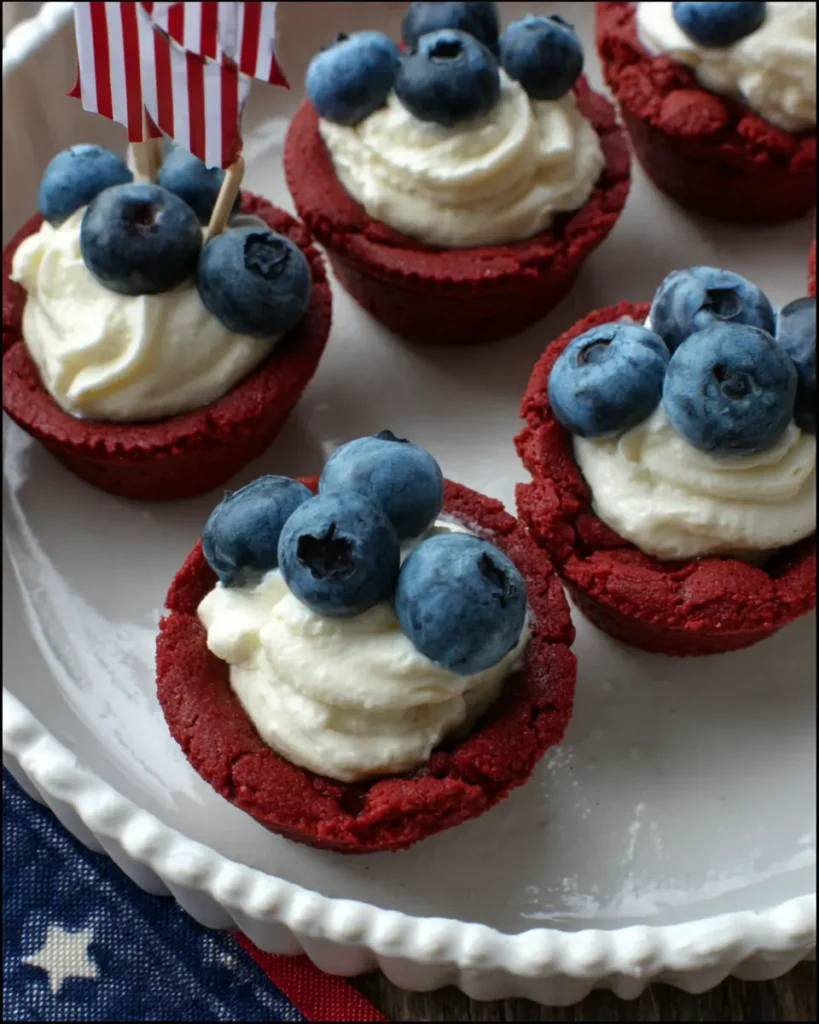
Red, White & Blue Cookie Cups are a delightful dessert, perfect for any patriotic celebration. Whether it’s the Fourth of July, Memorial Day, or any summer gathering, these cookie cups not only taste amazing but also look stunning. The vibrant colors of the red velvet, luscious white cheesecake filling, and bright blue blueberries create a feast for the eyes and the palate. Plus, they are easy to make, so you can impress your friends and family without spending hours in the kitchen.
Table of Contents
Table of Contents
How to Make Red, White & Blue Cookie Cups
Making Red, White & Blue Cookie Cups is a fun and straightforward process. You will start with red velvet cookie dough, create a rich cheesecake filling, and top it all off with fresh blueberries and festive sprinkles. Here’s how to do it step by step.
Ingredients
- One red velvet cake mix
- 1/3 cup vegetable oil or 1 stick (1/2 cup melted butter)
- 2 eggs
- 4 oz. softened cream cheese
- 1/2 teaspoon vanilla
- 1/4 cup granulated sugar
- 4 oz. Cool Whip (thawed)
- Ripe blueberries
- Seasonal Sprinkles
- Paper Flags
Directions
Red Velvet Cookie Cups
- Preheat your oven to 350°F (175°C).
- In a large mixing bowl, combine the red velvet cake mix, vegetable oil (or melted butter), and eggs. Mix well until everything is combined.
- Grease a muffin tin or use silicone muffin cups.
- Scoop about a tablespoon of dough into each cup, pressing it down gently with your fingers.
- Bake for about 10-12 minutes or until the edges are set but the centers are still soft.
- Remove from the oven and let cool for a few minutes before transferring them to a wire rack.
Cheesecake Filling
- In another bowl, beat together the softened cream cheese, vanilla, and granulated sugar until smooth and creamy.
- Gently fold in the thawed Cool Whip until combined and fluffy.
Garnish/Topping
- Once the cookie cups are completely cool, spoon a generous amount of the cheesecake filling into each cookie cup.
- Top with fresh blueberries and sprinkle seasonal sprinkles on top for a festive touch.
- Insert paper flags if desired for an extra patriotic flair.
How to Serve Red, White & Blue Cookie Cups
Serve these cookie cups chilled or at room temperature. They make an eye-catching centerpiece for any dessert table and are super fun to eat. Consider plating them on a large platter for a beautiful presentation. You can also serve them with extra blueberries on the side for those who want more fruit.
How to Store Red, White & Blue Cookie Cups
To keep your Red, White & Blue Cookie Cups fresh, store them in an airtight container in the refrigerator. They will stay good for about 3-5 days. If you make them in advance, it is best to fill them with the cheesecake mixture just before serving to keep the cookie cups from getting soggy.
Tips to Make Red, White & Blue Cookie Cups
- For the best flavor and texture, make sure the cream cheese is at room temperature before beating it.
- You can experiment with different flavors of cake mixes if you want to change things up.
- If you prefer a less sweet cheesecake filling, reduce the sugar quantity to 2 tablespoons instead of 1/4 cup.
- Make sure not to overbake the cookie cups; they should be soft in the middle.
- Use a cookie scoop for uniform cookie sizes to ensure even baking.
Variation
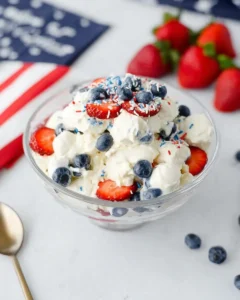
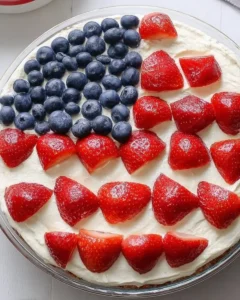
You can easily switch up the flavor by using different cake mixes such as chocolate or lemon. You can also replace the blueberries with other fruits like strawberries or raspberries to fit the theme of your gathering or your personal taste preferences.
Celebrate summer holidays with Red, White & Blue Cookie Cups, a festive dessert packed with colorful layers, sweet flavors, and patriotic charm for every gathering.
For more fresh recipe inspiration, explore cowboy caviar couscous salad recipe ideas or this easy no mayo potato salad recipe guide. You can also discover refreshing watermelon mint salad recipes.
FAQs
1. Can I use homemade red velvet cake instead of a cake mix?
Yes, you can use a homemade red velvet cake recipe. Just make sure it is suitable for making cookie cups, or adjust the baking time accordingly.
2. What can I use instead of Cool Whip?
If you prefer, you can use freshly whipped cream instead of Cool Whip. Just beat heavy cream until soft peaks form and gently fold it into the cream cheese mixture.
3. Can I freeze the cookie cups?
Yes, you can freeze the cookie cups once they are baked. However, it’s best to fill them with the cheesecake filling right before serving for the best texture.
4. How can I make these cookie cups gluten-free?
You can substitute the red velvet cake mix with a gluten-free cake mix. Make sure all other ingredients are also gluten-free.
Creating Red, White & Blue Cookie Cups is a rewarding experience that showcases your baking skills while providing a delicious and visually stunning treat. With a simple list of ingredients and easy-to-follow steps, anyone can make these delightful patriotic desserts. Enjoy the process and share them with loved ones at your next gathering!
Follow Us for more recipes on X and Pinterest
PrintRed, White & Blue Cookie Cups

Delightful dessert cookie cups perfect for any patriotic celebration, featuring red velvet, cheesecake filling, and blueberries.
- Prep Time: 15 minutes
- Cook Time: 12 minutes
- Total Time: 27 minutes
- Yield: 12 servings 1x
- Category: Dessert
- Method: Baking
- Cuisine: American
- Diet: Vegetarian
Ingredients
- 1 package red velvet cake mix
- 1/3 cup vegetable oil or 1/2 cup melted butter
- 2 eggs
- 4 oz. softened cream cheese
- 1/2 teaspoon vanilla extract
- 1/4 cup granulated sugar
- 4 oz. Cool Whip (thawed)
- 1 cup ripe blueberries
- Seasonal sprinkles
- Paper flags (optional)
Instructions
- Preheat your oven to 350°F (175°C).
- In a large mixing bowl, combine the red velvet cake mix, vegetable oil (or melted butter), and eggs. Mix well until everything is combined.
- Grease a muffin tin or use silicone muffin cups.
- Scoop about a tablespoon of dough into each cup, pressing it down gently with your fingers.
- Bake for about 10-12 minutes or until the edges are set but the centers are still soft.
- Remove from the oven and let cool for a few minutes before transferring them to a wire rack.
- In another bowl, beat together the softened cream cheese, vanilla, and granulated sugar until smooth and creamy.
- Fold in the thawed Cool Whip until combined and fluffy.
- Once the cookie cups are completely cool, spoon a generous amount of the cheesecake filling into each cookie cup.
- Top with fresh blueberries and sprinkle seasonal sprinkles on top for a festive touch.
- Insert paper flags if desired for an extra patriotic flair.
Notes
For best results, ensure cream cheese is at room temperature before beating. You can experiment with different flavors of cake mixes and fruits.
Nutrition
- Serving Size: 1 cookie cup
- Calories: 250
- Sugar: 15g
- Sodium: 180mg
- Fat: 10g
- Saturated Fat: 4g
- Unsaturated Fat: 6g
- Trans Fat: 0g
- Carbohydrates: 35g
- Fiber: 1g
- Protein: 3g
- Cholesterol: 30mg